Admin-Scout 2.3 - Overview new features in version 2.3
 Already in the last versions many improvements were introduced for the security of the Admin Scout. It was very important for us that during a login no more passwords are transferred between Admin-Scout and the browser.
Version 2.3 continues our efforts to provide increased security against data spying between Informix Server and client or our Admin-Scout.
Overview of the new features:
- https port is now active - generating of a self-signed certificate.
- Setting up an encrypted SSL connection on the database port.
- Easier selection of instances - access to instances of different groups.
- Autologon-Feature – automatic connection to a standard instance.
- New Scheduler module - all Scheduler modules are now available in one place.
- New module Cluster Configuration.
- New module DBSpace Layout History.
- Backup/Restore now with SQL Editor Files.
- Additional reporting on the InformixHQ Monitoring Database.
https port is now active
Version 2.3 activates the https port. A self-signed certificate is generated during installation and the https virtual host is activated. In order to have a high connection security a 2048Bit Diffie-Hellman-Group is generated, which also explains the long installation time of the update. On the Raspberry Pi you have to expect about 30 minutes for the installation.
Possibility and setup of an encrypted SSL connection on the database port (VM only)
In version 2.3, all prerequisites were created on the Admin-Scout to establish an encrypted SSL connection between the admin scout and the database. Unfortunately, this type of connection is only available in the Admin-Scout VM. In the client SDK implementation for ARM-6, which runs on the Raspberry Pi, IBM does not support SSL encryption. This is probably because the GSKit does not support the platform.
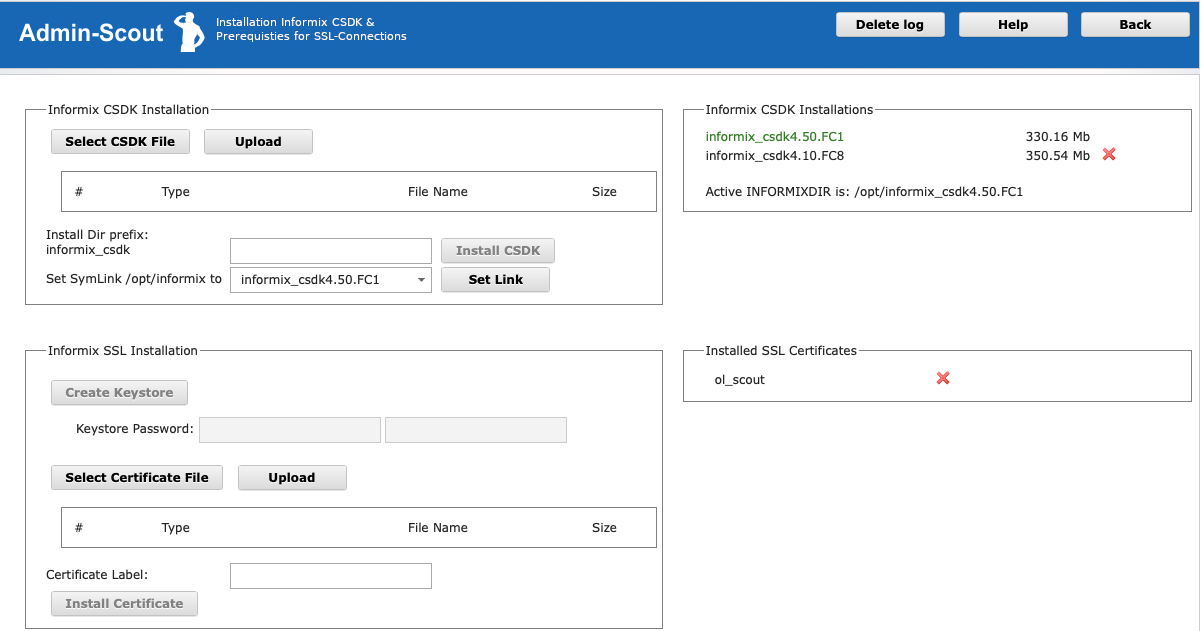
There is a new configuration module for the setup, which can be accessed from the Admin-Scout start page under 'Installation CSDK / SSL'. As the name suggests, it can be used to install a new Informix Client SDK and SSL key on the Admin Scout. The CSDK installation is necessary to be able to use modern GSKit versions on the Admin-Scout and to close possible security gaps with the updates.
If a new client SDK is installed, all necessary prerequisites for the admin scout are created.
With a new client SDK version the PDO driver for the PHP will be compiled and installed in the Admin-Scout. Also the SSL directory and the file conssl.cfg necessary for the encryption will be created.
If the installation was successful, the symbolic link /opt/informix is converted to this directory and the new CSDK is activated.
In the active INFORMIXDIR, a password protected certificate store can now be created and the private keys for each instance with which encrypted communication is to take place can be imported into the store under their label. Once this has been done, a connection with the onsocssl protocol can be set up in the Connection Manager.
Easier instance selection - possibility to access different groups of instances
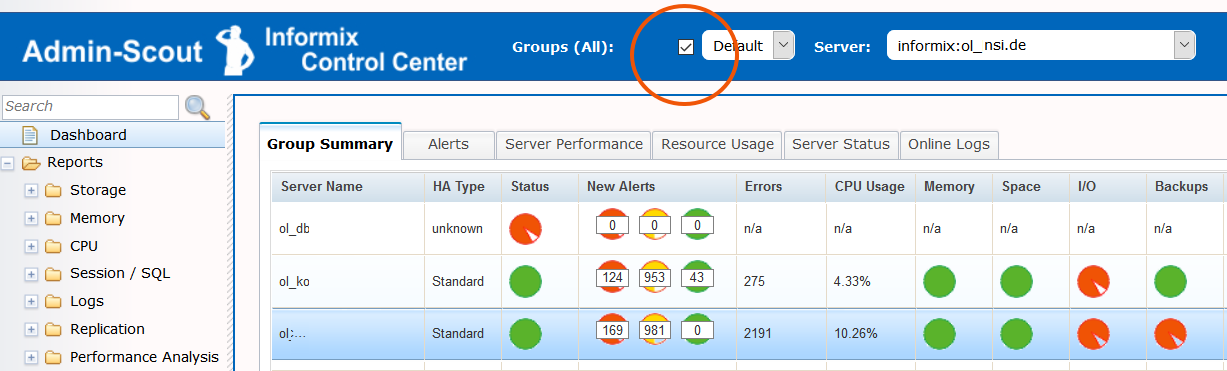
Previously it was possible to switch between all instances of a group using the instance selection field in the ICC header. A new check box in the logon dialog (Groups (All)) now controls whether the previous behavior remains active or whether the switch field is filled with all instances of all password-free groups.
In addition, reports such as the Dashboard also use this switch and display all instances of all password-free groups on request. This switch can also be set later in the header of all reports. There all groups are also displayed in a toggle field. Password-protected groups are marked with a '*' after the group name. If such a group is selected, the password is requested once. After successful authentication, the admin scout remembers the length of the session that you have successfully authenticated. Setting the All Groups checkbox then also includes the instances of the password-protected group.
If the group is changed via the toggle field, the active connection always remains active for the time being, even if it does not belong to the selected group.
Warning at database connection change in multi-window mode
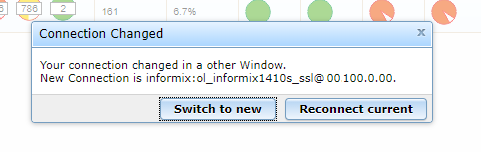 All browser windows or tabs of a browser that are open at the same time as the Admin-Scout run in the same browser session. Therefore, changing the connection in one window or tab will affect all other windows. Especially server scripts (Ajax), as used by many Admin-Scout modules, suddenly no longer run on the instance displayed in the browser window. The Admin-Scout version 2.3 now checks if the connection visible there, is still the current one and warns if it is changed.
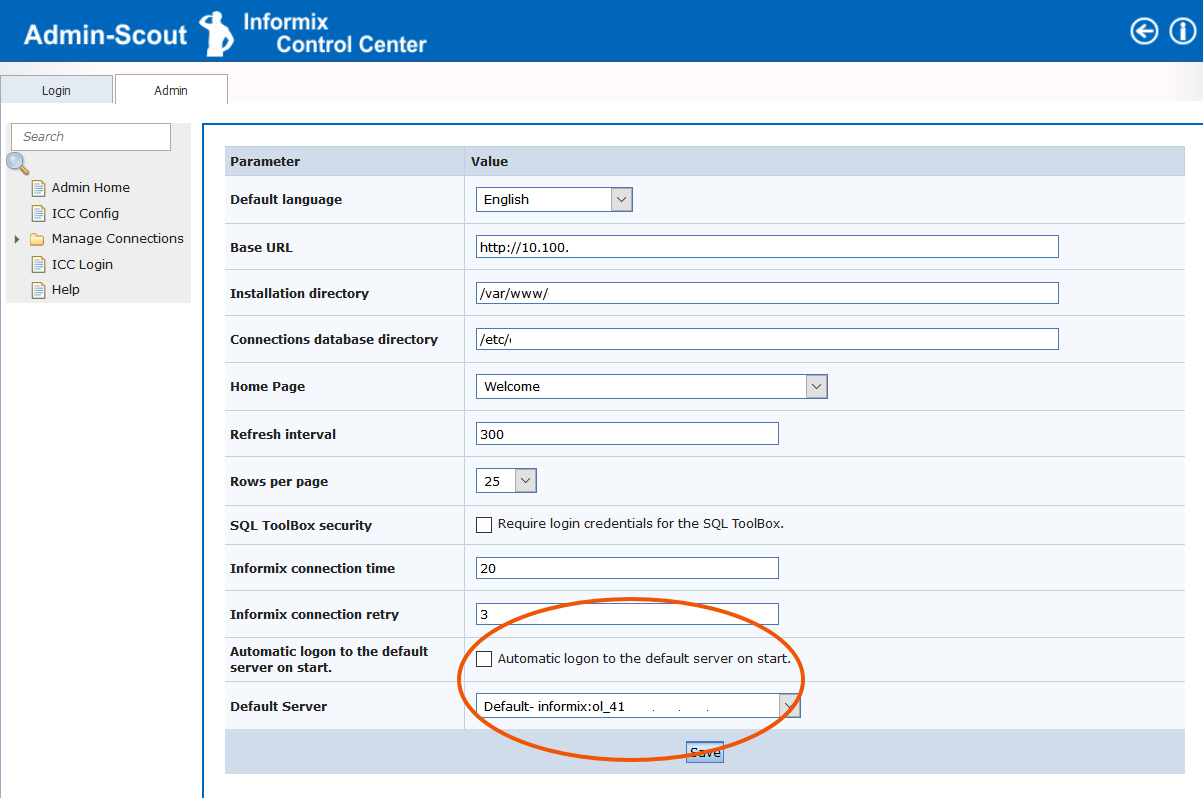
Autologon-Feature
In the configuration (ICC -> Admin --> ICC Config) you can set a default instance and activate the AutoLogon. After HTAccess authentication you will be automatically connected to this instance. The instance must be in a password-free group. If a password is subsequently set in the group in which the instance is located, or if it is moved to a protected group, the login dialog appears again.
Please note: if Autologon is active and a session timeout occurs, you will always be connected to the default instance. Especially in modules where background scripts work, this does not necessarily become transparent. So always press F5 (reload) in the browser if you have had a report without interaction on the screen for a long time.
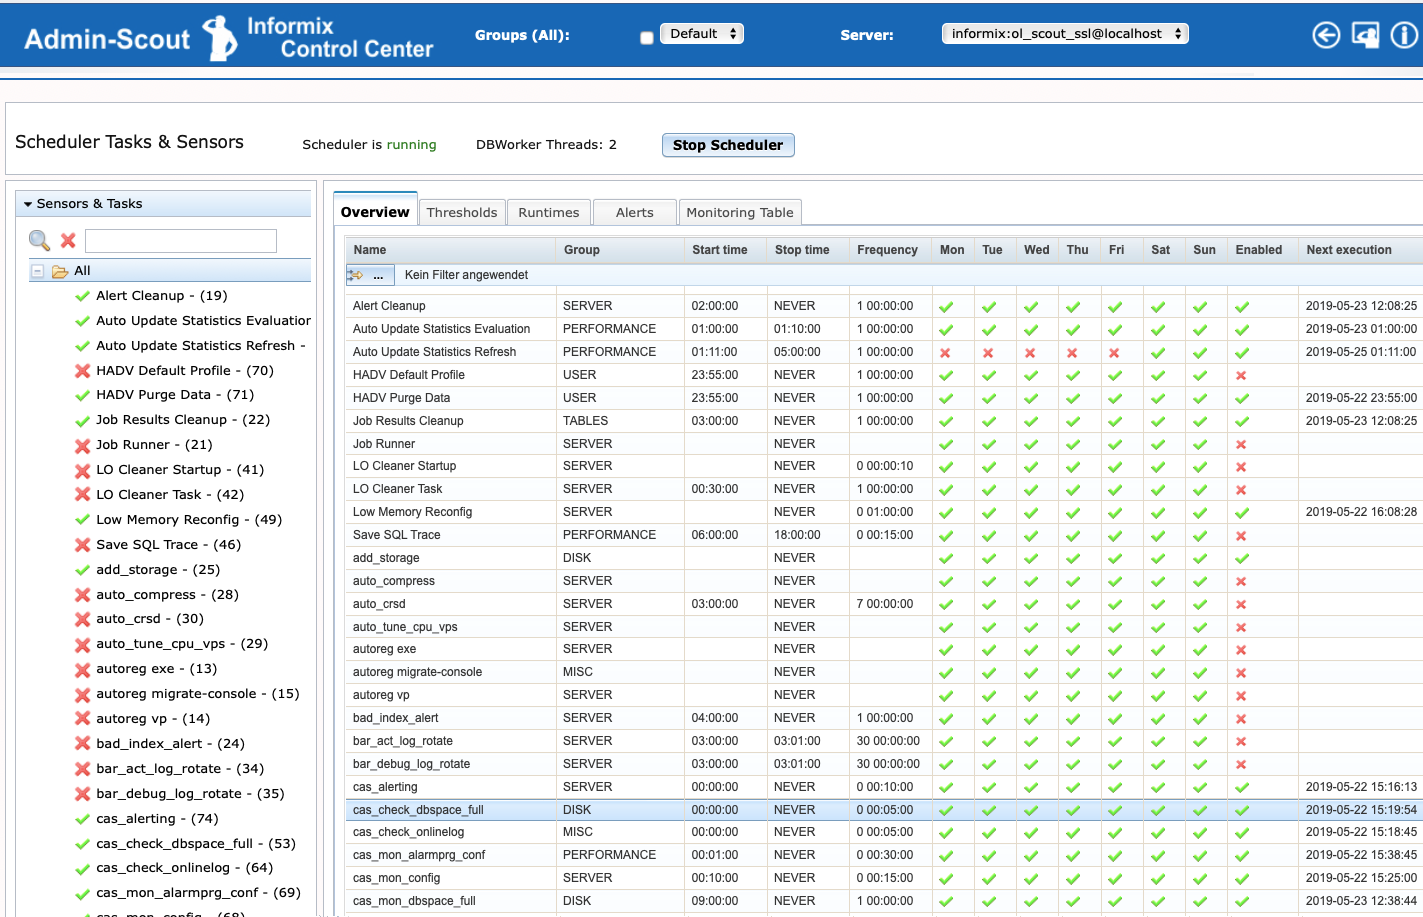
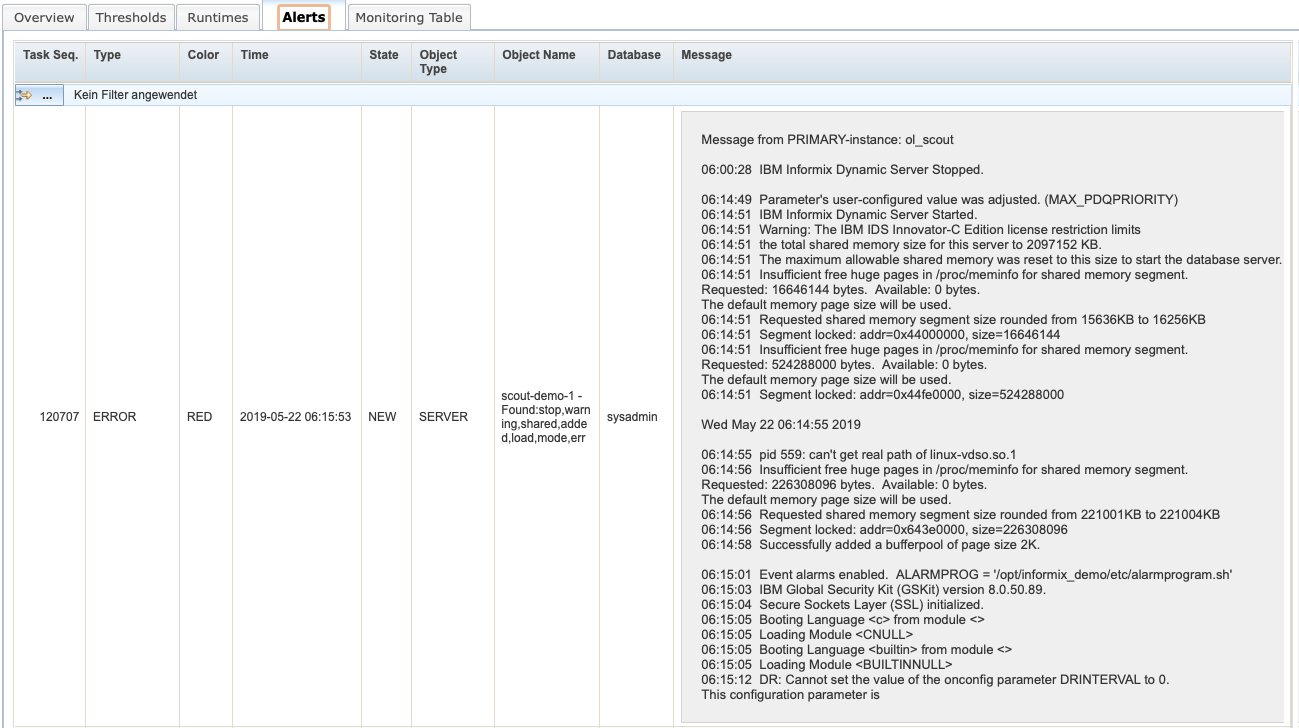
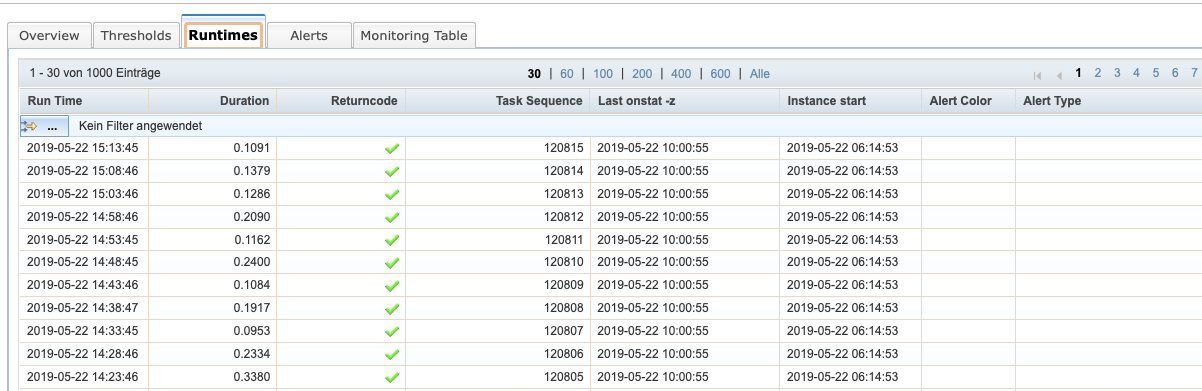
New Scheduler module
In menue Administration -> Scheduler all scheduler modules were combined in a completely new module. Now you have the possibility to edit all Task or Sensor Parameters / Thresholds, to control the Task / Sensor runs, to monitor the generated alarms and to view the result table.
New module Cluster Configuration
Informix keeps all cluster members on the primary in the table sysmaster:syscluster. It contains the instance names / -aliases that hold the instances connected. For the primary, this is usually the DBSERVERNAME. For the primary, this does not have to be the alias under which it can be reached in the network (e.g. shmem connection). In onconfig this can still be controlled with the HA_ALIAS onconfig variable, but if in sqlhosts the option s=6 is used for the connections, it is no longer possible to access the server with SQL.
For different evaluations and sensors the Admin-Scout needs SQL on another cluster server. Therefore you can set alternative aliases for an instance, which are then used for SQL queries.
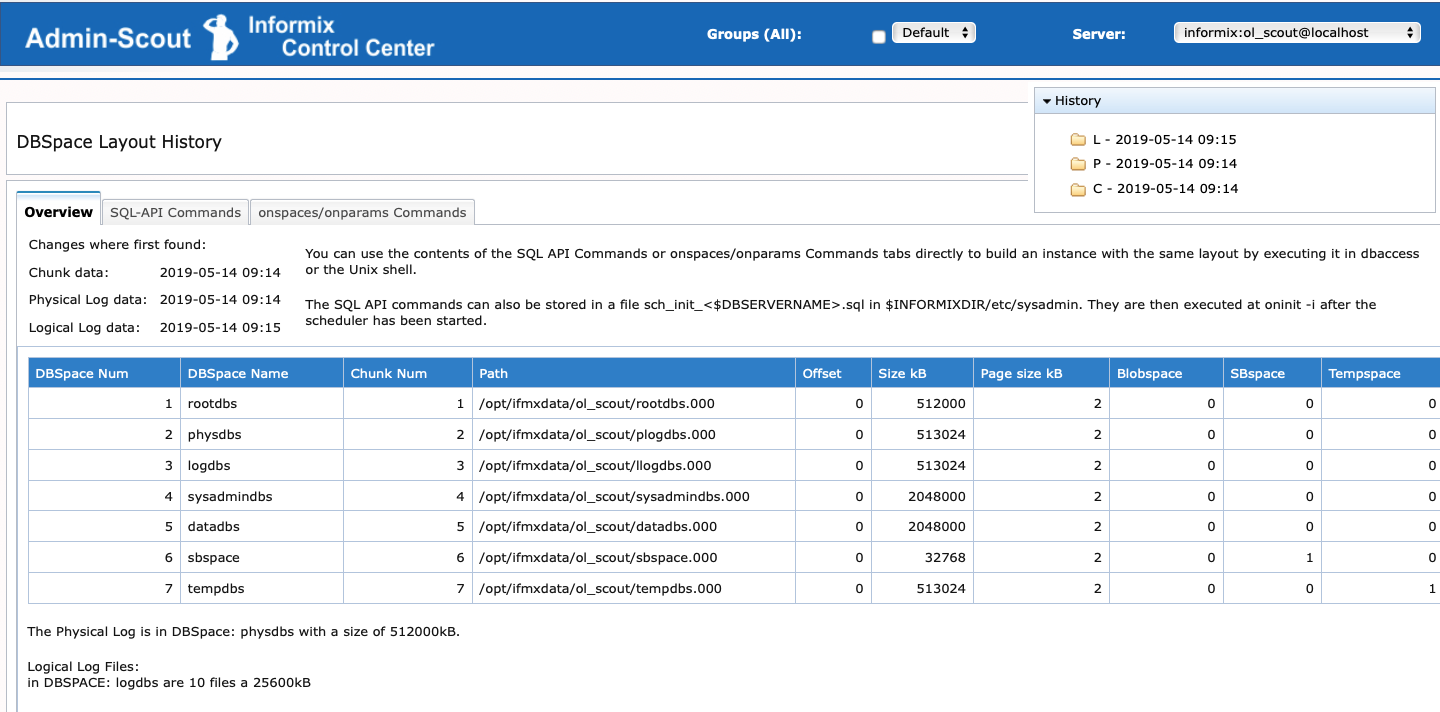
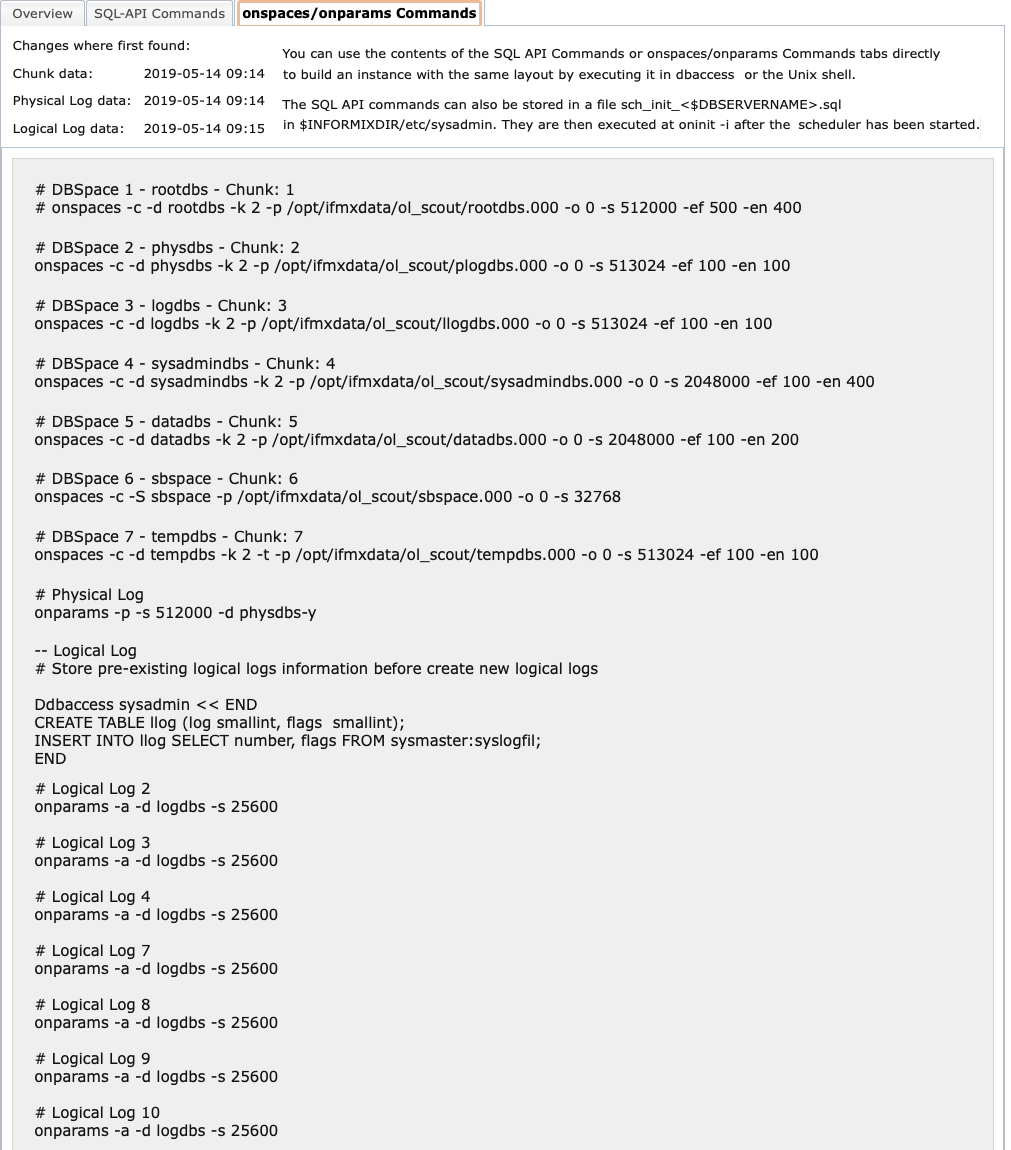
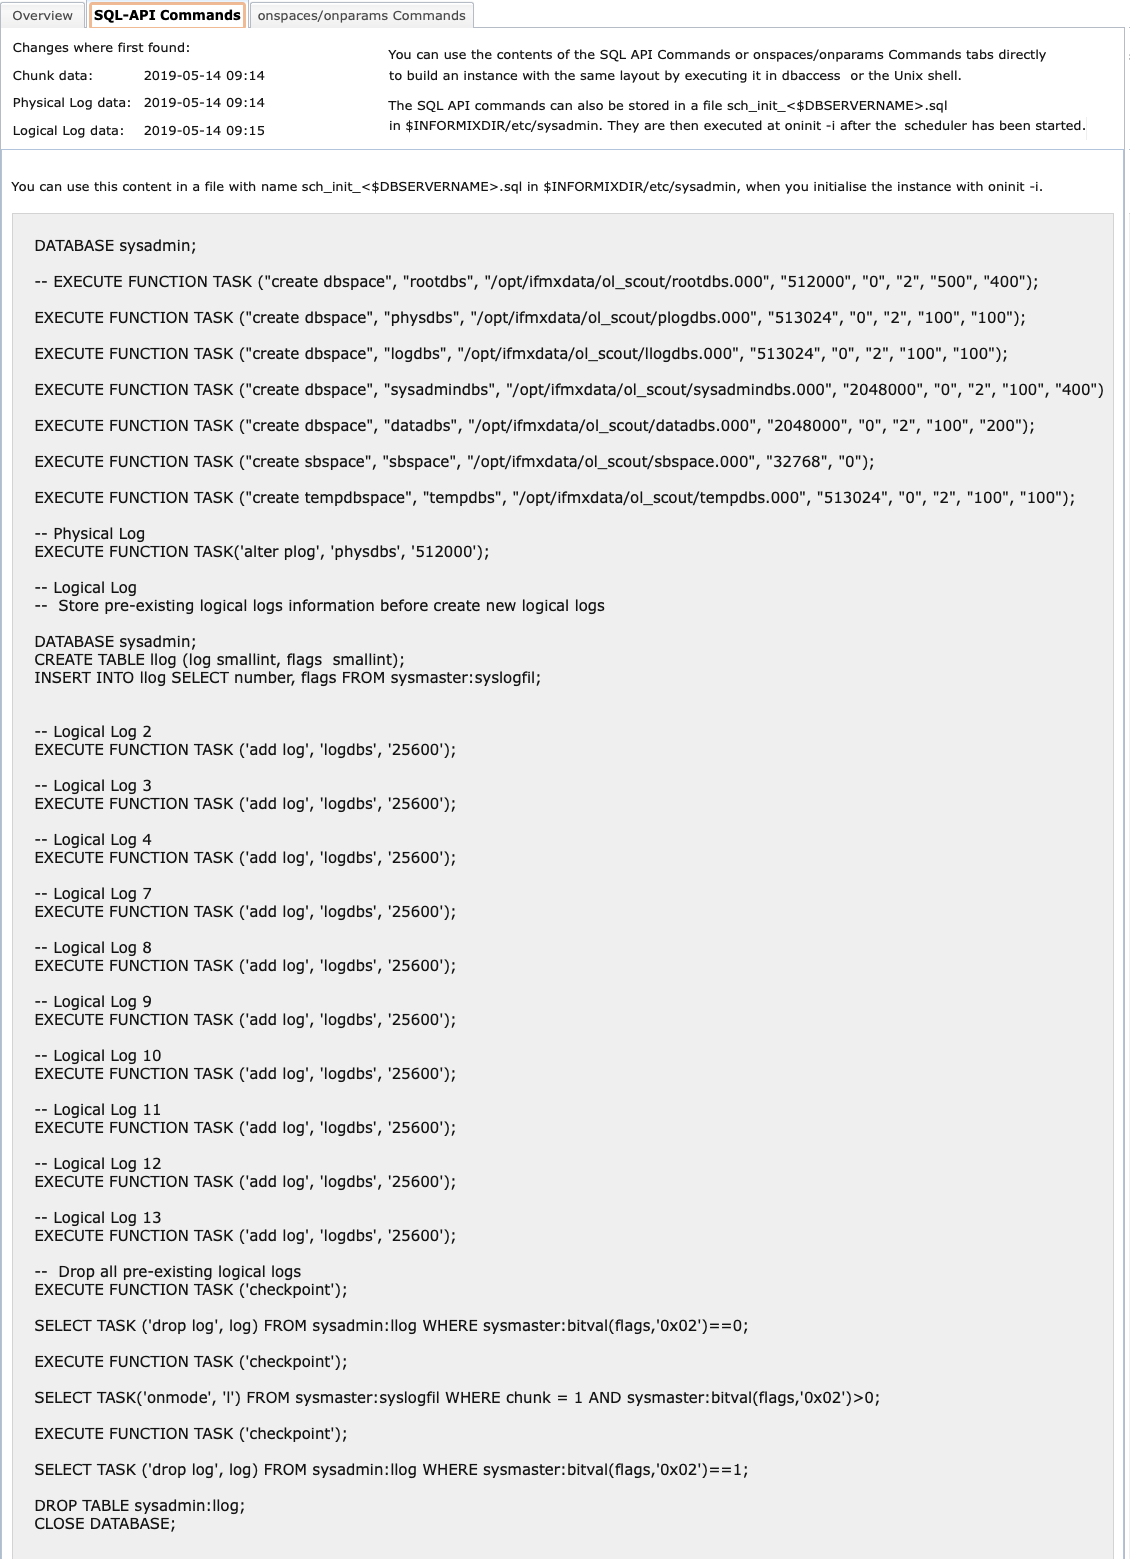
DBSpace Layout History
The cas_check_dbspace_full task checks since module version 1.9. the layout of the DBSpaces/Chunks and the phys.- and log. Logs. This is stored in 3 additional tables in the sysadmin. To monitor changes there is a new module Reports -> Storage -> DBSpace Layout History where you can search for changes.
On the basis of this data, a daily update of the DBSpace layout is also displayed in the daily report. This is done both textually and as SQL-API commands or onspaces / onparam calls.
This report is also available under Reports-> Storage (check 'incl. DBSpace Layout').
Backup/Restore now contains the SQLEditor files
The files stored in the SQL Editor are now also included in the backup.
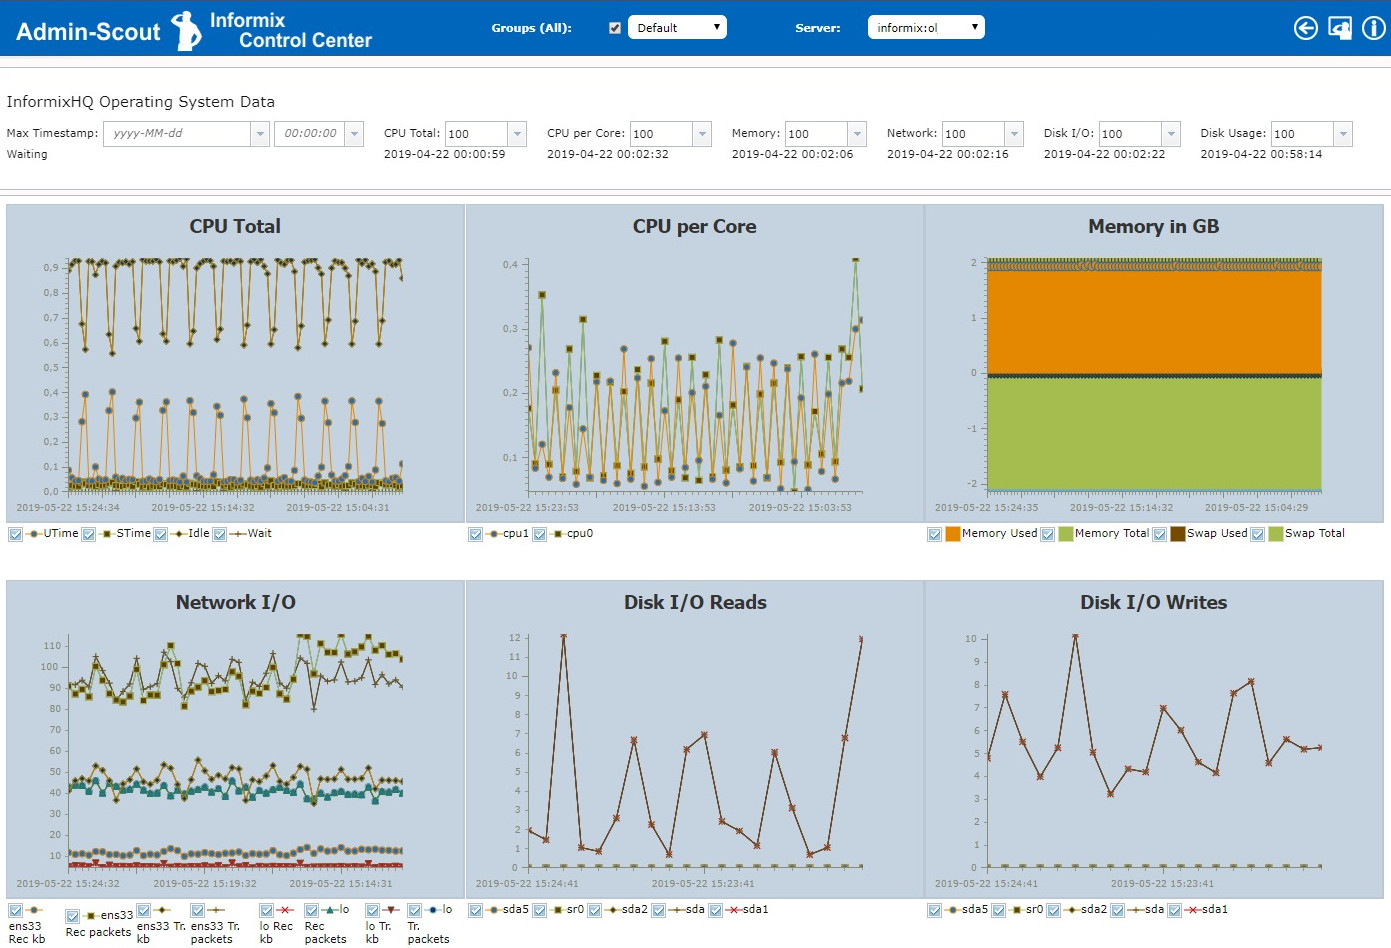
Additional reporting of the InformixHQ Monitoring Database
With Informix version 14.1, InformixHQ is part of the server. InformixHQ has a server component that provides reports via http. For each instance, agents are installed that collect measured values and write them to a monitoring database. The Admin-Scout accesses this monitoring database and creates its own evaluations which are displayed graphically. For each instance in the connection definition it is necessary to specify the instance containing the Monitorin DB, the name of the database and the agent ID of the InformixHQ agent from its properties file.
If this data is stored, you can evaluate the collected operating system data of the server on which the instance is running under Reports -> Other -> InformixHQ OS Data. This can also be done for past periods, depending on how long the retention periods are set in InformixHQ.